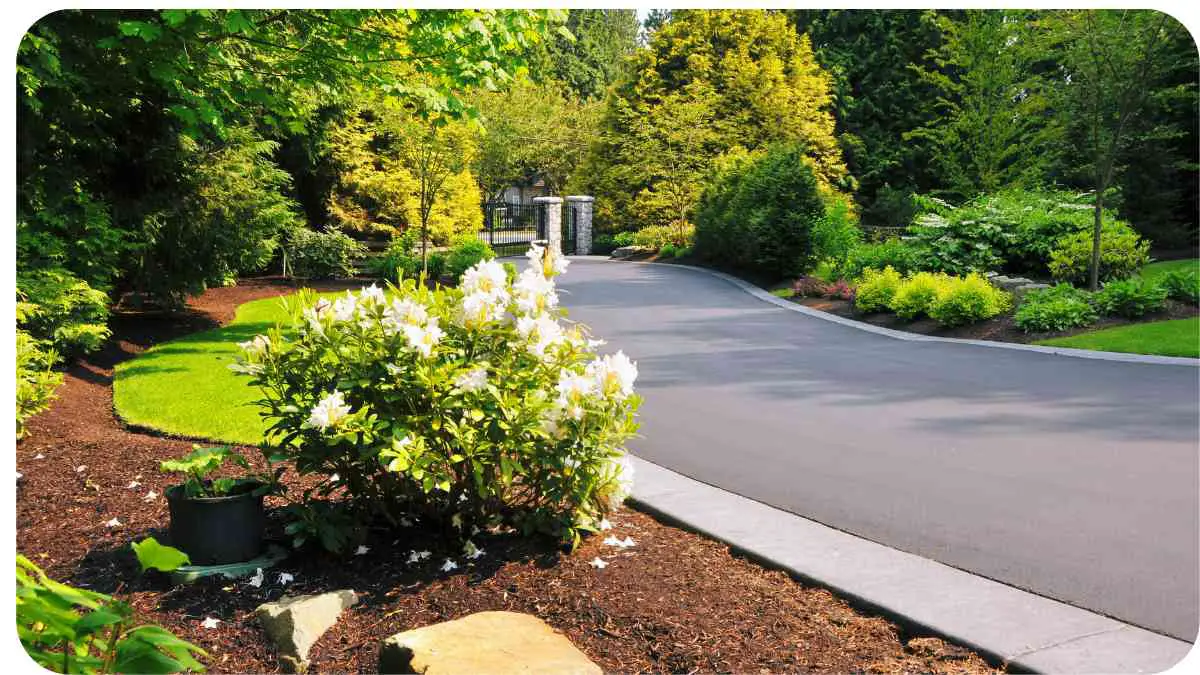
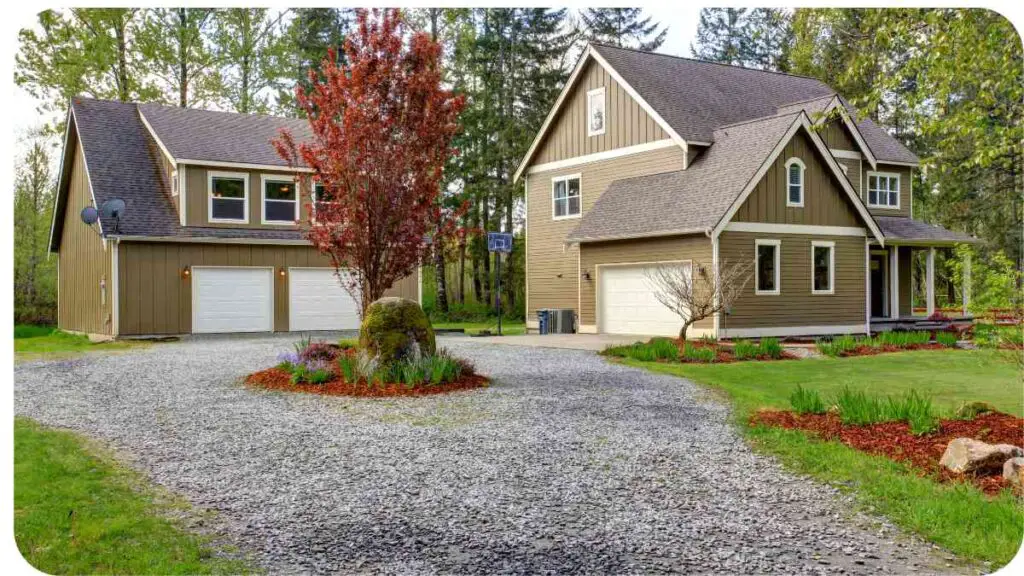
Gravel driveways are a popular choice for homeowners seeking a rustic, cost-effective, and low-maintenance option for their property. However, one common issue that can arise with gravel driveways is the dreaded washout.
Have you ever walked out to find your driveway looking more like a riverbed after a heavy rain? If so, you’re not alone! Washouts can be frustrating, but they are also preventable and fixable with the right know-how.
In this article, we’ll dive into the nitty-gritty of gravel driveway maintenance, focusing on troubleshooting washouts. From understanding what causes these issues to practical, step-by-step solutions, we’ve got you covered. So, grab a cup of coffee, and let’s get started on the path to a washout-free gravel driveway!
| Takeaways |
|---|
| Invest in high-quality, angular gravel to resist washouts. |
| Regularly inspect and maintain your driveway to catch and fix issues early. |
| Install proper drainage systems, such as French drains, to manage runoff. |
| Consider adding water bars on steep driveways to prevent erosion. |
| Regrade your driveway annually to maintain a smooth, crowned surface. |
| Explore permeable paving systems as a long-term solution for chronic washouts. |
| Balance DIY maintenance with professional help for more extensive repairs. |
| Use local gravel that suits your region’s climate and soil conditions. |
| Create a seasonal maintenance schedule to keep your driveway in top shape. |
| Don’t overlook minor issues; small repairs can prevent major damage. |
Understanding Gravel Driveways

Types of Gravel for Driveways
When it comes to gravel driveways, not all gravel is created equal. There are different types of gravel, each with its unique characteristics, and choosing the right one can make a significant difference in the longevity and performance of your driveway.
- Crushed Stone: Known for its sharp edges, crushed stone provides excellent traction, making it ideal for driveways. It packs well and stays in place better than other types.
- Pea Gravel: With its smooth, rounded edges, pea gravel is aesthetically pleasing and comfortable to walk on. However, it’s prone to shifting and may not stay in place as well as crushed stone.
- River Rock: Similar to pea gravel but larger, river rock is another attractive option, though it’s more suitable for decorative purposes than for use in a driveway.
- Item #4: A mix of gravel, sand, and dirt, Item #4 compacts well and forms a solid base for driveways. It’s a great choice for areas with heavy vehicle traffic.
If your driveway is prone to washouts, one effective solution is incorporating retaining walls. Learn how to prevent erosion by addressing common issues and fixes related to retaining walls, ensuring that your driveway remains stable even during heavy rainstorms.
Pros and Cons of Gravel Driveways
Gravel driveways come with their own set of advantages and disadvantages. Understanding these can help you decide whether a gravel driveway is the right choice for you.
- Pros:
- Cost-Effective: Gravel is one of the most affordable materials for driveways.
- Easy to Install: Unlike asphalt or concrete, gravel driveways can be installed with minimal labor.
- Good Drainage: Gravel naturally allows water to pass through, reducing the risk of flooding.
- Cons:
- Prone to Washouts: Without proper maintenance, gravel driveways can develop ruts and washouts.
- Regular Maintenance Required: Gravel driveways need periodic replenishing and regrading.
- Dusty in Dry Conditions: Gravel can create dust, especially in dry weather.
Gravel Driveway Construction Basics
Constructing a gravel driveway may seem simple, but there’s more to it than just spreading gravel on the ground. Proper construction ensures durability and reduces the likelihood of washouts.
- Site Preparation: Clear the area of any vegetation and debris. Excavate the topsoil to create a solid base.
- Installing a Base Layer: A base layer of larger stones (often called “base gravel”) should be spread and compacted to provide a stable foundation.
- Adding the Gravel: The top layer of gravel, usually smaller stones, is spread over the base layer and compacted.
- Creating a Crown: A slight crown in the middle of the driveway encourages water to run off to the sides, reducing the risk of erosion.
Just like a sinking gravel driveway, stone pathways can face similar structural problems. Discover the remedies and recommendations for stabilizing sunken stone surfaces, which will help ensure that your driveway retains its level and smooth appearance over time.
Common Causes of Washouts
Gravel driveways are prone to washouts, especially during heavy rains or in areas with poor drainage. Understanding the root causes of these washouts is crucial in preventing them from occurring in the first place. Let’s explore some of the common factors that contribute to this issue.
Poor Drainage
One of the biggest culprits behind washouts is poor drainage. When water has nowhere to go, it tends to flow down the driveway, taking gravel along with it. Over time, this can create deep ruts and wash away significant portions of your driveway.
Tips:
- Ensure Proper Slope: Your driveway should have a gentle slope to encourage water to flow off to the sides rather than down the middle.
- Install Ditches or Swales: These can help direct water away from your driveway and prevent it from eroding the gravel.
Steep Slopes and Water Flow
If your driveway is on a steep incline, water will naturally flow faster, increasing the likelihood of washouts. Gravity is not always your friend in this situation!
Tips:
- Install Water Bars: These are raised ridges across the driveway that slow down water flow and divert it off to the sides.
- Use Larger Gravel: Larger stones are less likely to be washed away by fast-moving water, making them a better choice for steep driveways.
Inadequate Gravel Layer
Sometimes, the problem is simply that there isn’t enough gravel on your driveway. Without a thick enough layer, the gravel can’t resist the force of flowing water, leading to washouts.
Tips:
- Apply a Thick Gravel Layer: Ensure your driveway has at least 4-6 inches of gravel, compacted well, to resist erosion.
- Add More Gravel Periodically: Over time, gravel can settle or be displaced, so it’s important to add more as needed.
Gravel driveways are susceptible to washouts, much like patios experiencing hardscape heaving. Explore tips to address patio paver problems that can also be applied to gravel driveway maintenance, providing lasting solutions to surface instability.
Lack of Regular Maintenance
Neglecting regular maintenance can turn minor issues into major problems. A small rut today can become a large washout tomorrow if left unattended.
Tips:
- Inspect Regularly: Regularly check your driveway for signs of wear and tear, such as small ruts or areas where gravel is thinning.
- Perform Minor Repairs: Address small issues immediately to prevent them from escalating.
Preventing Washouts on Gravel Driveways
Prevention is always better than cure, and the same applies to gravel driveway maintenance. By taking proactive steps, you can minimize the risk of washouts and keep your driveway in top condition. Let’s dive into some effective strategies for preventing washouts.
Installing Proper Drainage Systems
Proper drainage is key to preventing washouts. Without it, water will find its own path down your driveway, often taking your gravel with it. Here are some drainage solutions that can make a big difference:
- French Drains: These are trenches filled with gravel and a perforated pipe that redirects water away from your driveway.
- Culverts: For driveways that cross over a low area, a culvert can allow water to pass under the driveway without causing erosion.
- Permeable Paving Systems: These systems allow water to seep through the surface, reducing runoff and erosion.
Selecting the Right Gravel
Not all gravel is equally effective in preventing washouts. Choosing the right type of gravel can go a long way in maintaining your driveway’s integrity.
- Angular Gravel: Crushed stone with sharp edges interlocks well, making it more stable and less likely to be washed away.
- Mixed Gravel Sizes: A mixture of different gravel sizes can create a more compact and stable surface.
Driveway washouts are often caused by erosion. If you’re dealing with a similar issue, understanding how to address soil erosion in sloped areas can help mitigate the damage and keep your gravel driveway in optimal condition.
Compacting Gravel for Stability
Compacting your gravel driveway is crucial for creating a solid surface that resists washouts. Loose gravel is easily displaced, but compacted gravel stays put, even during heavy rains.
- Use a Plate Compactor: This tool can help you compact the gravel effectively, creating a stable surface.
- Compact in Layers: If you’re adding new gravel, compact each layer before adding the next to ensure maximum stability.
Regular Maintenance Practices
Regular maintenance is essential for preventing washouts and extending the life of your gravel driveway. This includes:
- Regrading: Use a box scraper or tractor to periodically regrade your driveway, filling in low spots and redistributing gravel evenly.
- Weed Control: Weeds can weaken your driveway’s surface, making it more prone to erosion. Use herbicides or manual removal to keep weeds at bay.
- Edge Protection: Install barriers, such as timbers or large stones, along the edges of your driveway to keep gravel in place.
Table: Preventive Measures and Their Impact on Driveway Longevity
| Preventive Measure | Description | Impact on Longevity |
|---|---|---|
| Proper Drainage Installation | Installing French drains, culverts, or swales | Significantly reduces the risk of washouts |
| Selecting Angular Gravel | Using sharp-edged gravel that interlocks | Enhances stability and reduces displacement |
| Regular Compaction | Compacting gravel with a plate compactor | Increases surface stability and resistance to erosion |
| Routine Regrading | Periodically leveling the driveway | Prevents the formation of ruts and low spots |
| Edge Protection | Installing barriers to contain gravel | Helps maintain the shape and integrity of the driveway |
Troubleshooting Washouts: A Step-by-Step Guide
Even with the best preventive measures, washouts can still happen. When they do, it’s important to address the problem promptly to prevent further damage. Here’s a step-by-step guide to troubleshooting and repairing washouts on your gravel driveway.
Step 1: Assessing the Damage
The first step in fixing a washout is to assess the extent of the damage. Walk along your driveway and take note of any ruts, channels, or areas where gravel has been displaced. Understanding the severity of the washout will help you determine the appropriate repair approach.
Tips:
- Measure the Depth of Ruts: Use a tape measure to gauge the depth of any ruts. This will help you determine how much gravel is needed for repairs.
- Check for Drainage Issues: Look for signs of poor drainage, such as standing water or erosion near the edges of the driveway.
Just as even mulch distribution is vital for garden beds, a gravel driveway also benefits from uniform coverage. Learn how to ensure even distribution of materials, whether it’s mulch or gravel, for a polished and well-maintained appearance.
Step 2: Addressing Underlying Drainage Issues
Before you start filling in ruts or adding new gravel, it’s crucial to address any underlying drainage problems that may have caused the washout. Fixing these issues first will prevent the problem from recurring.
Tips:
- Install a French Drain: If water is pooling along your driveway, consider installing a French drain to redirect water away from the area.
- Regrade the Driveway: Ensure that your driveway has a slight crown or slope to encourage water to flow off to the sides.
Step 3: Regrading the Driveway
Regrading is the process of leveling and reshaping the surface of your driveway to eliminate ruts and improve drainage. This step is essential for repairing washouts and restoring the integrity of your driveway.
Tips:
- Use a Box Scraper: A box scraper attached to a tractor is ideal for regrading. It allows you to smooth out the surface and fill in any low spots.
- Focus on the Crown: Ensure that the middle of the driveway is slightly higher than the edges to promote proper water runoff.
Step 4: Adding and Compacting New Gravel
Once the driveway has been regraded, it’s time to add new gravel. This will fill in any ruts and restore the surface to its original level.
Tips:
- Use a Mixture of Gravel Sizes: A mix of larger and smaller gravel will create a more stable surface that resists washouts.
- Compact the Gravel: After spreading the new gravel, use a plate compactor to firmly compact the surface. This will reduce the likelihood of future washouts.
Step 5: Reinforcing Vulnerable Areas
Certain areas of your driveway may be more prone to washouts, especially if they are on a slope or near drainage outlets. Reinforcing these areas can prevent future damage.
Tips:
- Install Riprap: Large stones or riprap can be placed along the edges of your driveway or in areas with high water flow to protect against erosion.
- Use Geotextile Fabric: Laying down geotextile fabric under the gravel can help stabilize the surface and prevent washouts.
Table: Common Washout Problems and Solutions
| Washout Problem | Cause | Solution |
|---|---|---|
| Deep Ruts in Driveway | Heavy rain or poor drainage | Regrade driveway, add and compact new gravel |
| Gravel Displacement on Slopes | Steep incline, fast-moving water | Install water bars, use larger gravel |
| Pooling Water and Erosion | Inadequate drainage | Install French drain, regrade driveway |
| Frequent Washouts in One Area | Low spot or depression in driveway | Fill low spot, ensure proper crown for water runoff |
| Gravel Washing Away During Storms | Insufficient gravel layer, lack of compaction | Add more gravel, compact with plate compactor |
Choosing the Right Tools for Maintenance
Having the right tools at your disposal can make gravel driveway maintenance a much easier task. Whether you’re doing a quick repair or a full regrading, here are some essential tools to consider.
Essential Tools for Gravel Driveway Repairs
- Plate Compactor: A must-have for compacting gravel and ensuring a stable surface.
- Box Scraper: Ideal for regrading and leveling the driveway.
- Shovel and Rake: Basic tools for spreading gravel and making minor adjustments.
- Tamper: Useful for compacting small areas or tight spots where a plate compactor can’t reach.
- Geotextile Fabric: Helps stabilize the driveway and prevent gravel from shifting.
Renting vs. Buying Maintenance Equipment
If you don’t already own the necessary equipment for gravel driveway maintenance, you may be wondering whether to rent or buy. Here’s a quick comparison to help you decide.
- Renting: Renting equipment is a good option if you only need it for a one-time repair or if you don’t have storage space. However, rental costs can add up if you need to perform maintenance regularly.
- Buying: Purchasing equipment is a better option if you plan to maintain your driveway frequently. While the upfront cost is higher, it can be more cost-effective in the long run.
Gravel Driveway Maintenance Tips
Maintaining your gravel driveway is an ongoing process, but with the right strategies, you can keep it in top shape year-round. Here are some practical tips for dealing with different aspects of gravel driveway maintenance.
Regular Inspection and Minor Repairs
Regularly inspecting your driveway and performing minor repairs as needed can prevent small issues from becoming major problems.
Tips:
- Walk the Driveway Monthly: Take a walk along your driveway at least once a month to check for any signs of wear and tear.
- Fix Small Ruts Immediately: Use a rake or shovel to fill in small ruts as soon as you notice them.
Dealing with Seasonal Changes
Seasonal changes can affect your gravel driveway in different ways. Here’s how to handle maintenance throughout the year.
- Spring: After the snow melts, regrade your driveway to fix any ruts caused by winter weather.
- Summer: In dry conditions, water the driveway occasionally to reduce dust and keep the gravel settled.
- Fall: Prepare for winter by adding a fresh layer of gravel and compacting it well.
- Winter: Keep snow removal in mind, and avoid plowing too deeply, as it can scrape away gravel.
Tips for Handling Heavy Rainfall
Heavy rainfall can be a challenge for gravel driveways, but with the right precautions, you can minimize the impact.
Tips:
- Inspect Drainage Systems: Before the rainy season, check all drainage systems to ensure they’re clear and functioning properly.
- Add Gravel Before Storms: If a heavy storm is forecasted, consider adding a fresh layer of gravel to reinforce vulnerable areas.
Table: Seasonal Maintenance Checklist
| Season | Maintenance Task | Notes |
|---|---|---|
| Spring | Regrade driveway, fill in ruts | Repair damage caused by winter weather |
| Summer | Water driveway, reapply gravel as needed | Reduce dust and keep gravel settled |
| Fall | Add fresh gravel, compact surface | Prepare for winter weather |
| Winter | Clear snow carefully, avoid deep plowing | Prevent gravel displacement during snow removal |
Long-Term Strategies for Gravel Driveway Maintenance
Maintaining a gravel driveway is not just about quick fixes and immediate repairs; it’s also about implementing long-term strategies that will keep your driveway in great condition for years to come. By adopting these strategies, you can reduce the frequency of repairs, extend the life of your driveway, and save money in the long run.
Investing in High-Quality Gravel
One of the most effective long-term strategies is investing in high-quality gravel from the start. The right type of gravel will last longer, resist washouts, and require less maintenance overall.
Tips:
- Choose Durable Materials: Look for gravel that is made from durable materials, such as crushed stone or granite, which can withstand heavy use and resist erosion.
- Consider Local Gravel: Local gravel is often better suited to your specific climate and soil conditions, making it more resilient.
Creating a Maintenance Schedule
Establishing a regular maintenance schedule is key to preventing major issues down the line. By performing routine checks and minor repairs on a set schedule, you can address problems before they escalate.
Tips:
- Monthly Inspections: As mentioned earlier, walking your driveway once a month allows you to spot and fix issues early.
- Seasonal Maintenance: Align your maintenance tasks with the seasons, ensuring that your driveway is prepared for whatever weather conditions are coming next.
Professional vs. DIY Maintenance
Deciding whether to handle driveway maintenance yourself or hire a professional is an important consideration. While DIY maintenance can save money, professionals bring experience and equipment that can make a big difference.
DIY Maintenance:
- Pros: Cost-effective, allows for flexibility in timing, and gives you control over the process.
- Cons: Time-consuming, requires investment in tools, and may not be as effective as professional work.
Professional Maintenance:
- Pros: Expertise in identifying and addressing issues, access to specialized equipment, and potentially higher-quality results.
- Cons: More expensive and requires scheduling in advance.
Considering Permeable Paving Systems
If washouts and erosion continue to be a problem, you might consider upgrading to a permeable paving system. These systems allow water to pass through the surface, reducing runoff and erosion.
Advantages:
- Reduces Runoff: Permeable pavers reduce the amount of runoff that can cause washouts.
- Environmental Benefits: These systems are more eco-friendly, as they help manage stormwater naturally.
- Long-Term Durability: Permeable pavers can last for many years with minimal maintenance, making them a smart long-term investment.
Case Study: Successful Gravel Driveway Maintenance
To illustrate the effectiveness of these strategies, let’s look at a case study from John, a homeowner who turned his gravel driveway into a model of durability and resilience.
Background: John lives in a rural area with heavy rains in the spring and fall. His driveway used to suffer from frequent washouts, requiring constant repairs.
Challenges:
- Frequent Washouts: Heavy rains would erode large sections of the driveway.
- Steep Slope: The driveway’s incline made it particularly vulnerable to erosion.
Solutions:
- Invested in High-Quality Gravel: John switched to a mix of larger, angular gravel that interlocks better and resists movement.
- Installed Drainage Systems: He added French drains and water bars to manage runoff and direct water away from the driveway.
- Regular Maintenance Schedule: John established a seasonal maintenance schedule, performing minor repairs every spring and fall.
Results:
- Reduced Washouts: The driveway now holds up much better during heavy rains, with minimal washout issues.
- Longer Gravel Lifespan: The high-quality gravel has significantly reduced the need for reapplication.
- Cost Savings: Although the initial investment in better gravel and drainage was higher, John now spends less on repairs and maintenance overall.
Conclusion
Maintaining a gravel driveway might seem daunting at first, but with the right strategies and tools, it’s entirely manageable. Whether you’re dealing with minor ruts or major washouts, the key is to take a proactive approach, addressing issues as soon as they arise and investing in long-term solutions.
Remember, the health of your driveway is an ongoing project. By following the tips and strategies outlined in this guide, you can keep your gravel driveway in top shape for years to come, ensuring it remains a functional and attractive part of your property.
Further Reading
If you’re looking for more information on maintaining and troubleshooting your gravel driveway, check out these helpful resources:
- How to Prevent Your Gravel Driveway from Washing Out: This guide offers practical tips on preventing washouts, focusing on proper drainage and gravel selection.
- A Comprehensive Guide to Fixing Your Gravel Driveway: A detailed resource that covers everything from regrading to repairing common driveway issues.
- How to Maintain a Gravel Driveway: Learn the essentials of gravel driveway maintenance, including seasonal care and long-term strategies.
FAQs
How can I prevent washouts on my gravel driveway?
To prevent washouts, focus on improving drainage by installing water bars or French drains, and ensure your driveway has a slight crown for proper water runoff.
What is the best type of gravel for driveway maintenance?
Angular gravel, like crushed stone or granite, is ideal because it interlocks well and resists shifting, making it less prone to washouts.
How often should I add new gravel to my driveway?
You should add new gravel as needed, typically every 1-2 years, or whenever you notice significant thinning or ruts forming in the surface.
Can I fix a washout myself, or should I hire a professional?
Minor washouts can be repaired yourself with the right tools and gravel, but for large-scale washouts or underlying drainage issues, hiring a professional is recommended.
What should I do if my gravel driveway keeps washing out?
If your driveway frequently washes out, consider regarding it for better drainage, installing erosion control measures, or upgrading to a more durable type of gravel.

Hi! My name is Hellen James, and I’m a landscape designer in Los Angeles. I’ve been working with homeowners and businesses to help them improve the look of their properties for over 10 years.