If you live in an area that has hot summers and cold winters, the landscape can be a bit of a challenge. But don’t worry! In this blog post, we’ll show you how to xeriscape your yard and make it thrive even if it’s in an extreme climate zone.
| Key Takeaways |
|---|
| – Xeriscaping is a landscaping method that emphasizes water conservation through efficient irrigation, soil improvement, and plant selection. |
| – Choosing drought-resistant plants, designing a water-efficient layout, and incorporating hardscape elements are all essential components of a successful xeriscape design. |
| – Xeriscaping is beneficial for the environment, homeowners, and local communities. It can help reduce water usage, lower maintenance costs, and improve air and water quality. |
| – Resources such as guides and tips can help beginners learn how to xeriscape successfully. |
| – With xeriscaping, it’s possible to create a beautiful, low-water garden that can be enjoyed year-round. |
Step #1: What is Xeriscaping?
Xeriscaping is basically the art of landscaping with the environment in mind. It involves using native plants and low-water-use plants to create a beautiful garden that requires little maintenance, thereby reducing water usage.
The best part about xeriscaping is that it not only conserves water but can also save you money on your monthly bills, as well as give back to the environment by reducing pollution levels.
Step #2: Learn Your Region’s Climate
Now that you know what you want in a landscape, it’s time to learn about the climate in your region. The best way to do this is by visiting a local nursery and asking for help from an expert.
The staff at the nursery will be able to tell you which plants will grow well in your area (and which won’t) based on location, sun exposure, water availability, soil types, etc.
They should also be able to point out some of the native plants that are native to your region as well as those that were brought over from elsewhere but still thrive there.
Sustainable landscaping is not only beneficial for the environment, but also for homeowners. As we mentioned in our guide on why you need to implement sustainable landscaping, it can help reduce water usage, improve soil health, and create a beautiful outdoor space while saving money in the long run.
Step #3: Determine Your Landscape Design Needs.
Once you’ve identified your goals, it’s time to figure out what kind of landscape design will help you achieve them.
Here are some questions that can help:
How much time do you have to spend on maintenance? Are there any other factors that will impact the amount of time you’ll be able to put into maintenance? For example, maybe someone else in your household is willing to take care of most of the work or perhaps they’re just not interested in gardening at all.
What are your budget and aesthetic preferences? Do you want a traditional lawn or would a natural yard be more appealing? Would one material be less expensive than another when considering how long it will last and how frequently it needs replacement?
How do these choices affect the overall look of our yard space as well as its ability to perform its functions (e.g., growing food/flowers/vegetables) with minimal stress on our resources (energy consumption).
Determining Landscape Design Needs
| Question | Considerations |
|---|---|
| How will the space be used? | Entertainment, relaxation, gardening, etc. |
| What is the local climate? | Temperature range, rainfall amounts |
| What is the soil type and quality? | Drainage, nutrient levels |
| What is the sun exposure? | Full sun, partial sun, shade |
| What is the budget? | Expense for plants, irrigation, hardscaping, etc. |
Before xeriscaping, it’s important to evaluate your landscape design needs and preferences. The table outlines several questions that should be considered in the planning process, along with some corresponding considerations. By answering these questions and taking into account these factors, you can better determine the specifics of your xeriscape design and create a beautiful, low-water garden that meets your needs.
Step #4: Assess the Soil at Your Property
To determine what plants are best for your landscape and how to care for them, you’ll need to know a few things about your soil. The first step is to test the pH of your soil.
This can be done by sending a sample of soil off to a testing lab or by using an at-home kit available at most home improvement stores. It’s important that you understand what kind of pH level is optimal for your particular plant species before you start planting anything!
The next thing you’ll want to do is test drainage in different areas of your yard, as many plants require well-drained soils with good aeration (good drainage = less compacted dirt).
You may also want to take into account compaction issues in certain areas and make sure that those spots aren’t being overused by heavy equipment like lawn mowers or tractors–or even humans! And finally, don’t forget about fertility levels: if there isn’t enough organic matter present then it might be time for some fertilizer!
Did you know that sustainable landscaping can also benefit your local community? Our guide on the benefits of sustainable landscaping for your home and community highlights how it can improve air and water quality, reduce pollution, and even increase property values.
Step #5: Select the Right Plants for your Landscape Design
In order to have a successful xeriscaping project, you need to select the right plants for your landscape design.
The first thing that you should do is make sure that the plants that you plant are appropriate for your climate and soil type. If a plant is not suited for the environment at your property then it won’t survive and will look poor.
Secondly, it’s important to mix up the types of plants used in your landscape design so they don’t become too crowded or look too dull. If one type of plant was used throughout an entire yard or garden then it would be boring to look at because all other flower beds would be identical!
You’ll want each garden bed to have different styles so they don’t blend together too much when viewed from afar – this will help prevent monotony within any given area of land which could potentially lead towards boredom among visitors (which no one wants!).
Finally before deciding upon specific species’ there should be some consideration given as well as space considerations such as size constraints (if possible) – this ensures success even if something does fail due another reason besides just being undervalued by its owner!
That way profits won’t go down because someone else had a better idea than yours instead.”
Step #6: Create a Drip Irrigation System to Save Water.
If your design allows for it, install a drip irrigation system.
Use PVC pipe to connect your sprinklers and emitters (the small plastic devices that distribute water).
Measure the length of pipe you need to get from the main line to each sprinkler and add 1 foot of extra length. This will allow you to reach all areas of the yard with proper coverage, but won’t require any re-plumbing if you decide to change the location or layout of your system later on.
For those looking to create a beautiful garden while also conserving water, xeriscaping is a great option. Check out our guide on xeriscaping tips for a beautiful, sustainable garden to learn how to choose drought-resistant plants, design a water-efficient layout, and other helpful tips.
Step #7: Group Plants Together in a Smart Way
Group plants together in a way that makes sense. If you’re trying to create a garden with foliage that’s all the same color, you may want to put them together.
Group plants by height. Maybe your yard has three levels and you’d like to create some visual interest by having taller flowers on one level and smaller ones on another; or maybe it’s just easier for you if everything is at eye-level. Whatever works for you, group ’em!
Group plants by sun requirements or shade tolerance: For example, let’s say the front of your house gets direct sunlight most of the day while the back yard has more shade than light; here are some good options for each area:
Smart Plant Grouping
| Benefits | Example |
|---|---|
| Reduced water usage | Group plants with similar water needs (e.g. succulents and cacti) |
| Enhanced visual appeal | Combine plants with contrasting colors (e.g. yellow coreopsis with purple sage) |
| Improved soil health | Plant nitrogen-fixing species in the same area (e.g. clover and beans) |
| Increased pollinator activity | Use plants that attract bees and butterflies (e.g. lavender and milkweed) |
| Efficient resource usage | Arrange plants according to sun exposure and shade requirements (e.g. hostas under trees) |
Proper grouping and placement of plants is a key component of successful xeriscaping. The table outlines the various benefits of smart plant grouping and gives an example of each. Consider the individual needs and characteristics of each plant species when deciding where and how to group them in your xeriscape garden.
Step #8: Use Mulch For Xeriscaping Success
Mulch is a layer of material applied to the soil surface. It can be organic or inorganic, and it serves many purposes. Mulch will help control weeds, prevent erosion and retain moisture in your garden beds.
It’s best to use mulch sparingly so that it doesn’t smother plants’ roots or clog drainage systems around your home’s foundation. You’ll also want to choose a mulch that will decompose at an appropriate rate for your climate and landscape conditions.
Mulch can also be used as a decorative element for a xeriscaped garden bed!
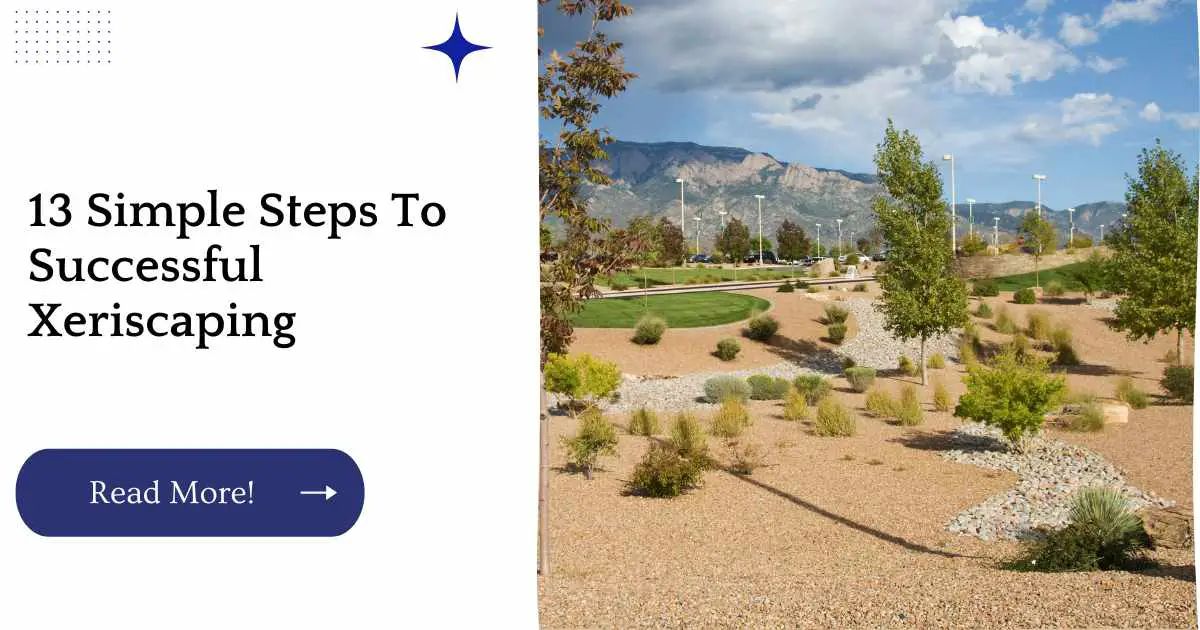
Step #9: Add Pavers and Rocks that Work with Your Landscape Design
Pavers and rocks play an important role in the design of your xeriscape garden. They can be used to create paths, borders and focal points that define the look of your landscape.
Choose pavers that work with your landscape design. For example, if you want a natural look, choose smooth stones over rough ones. You should also select durable pavers that are easy to maintain and repair if needed because these features will help save money over time on maintenance costs.
Rocks should also be chosen based on their appearance and location within your xeriscape garden or yard. It’s important to consider factors such as climate conditions (rock type) as well as soil conditions (rocks types) when choosing rocks for use in this area because they may need special care due to extreme temperatures or moisture levels found within specific areas throughout Colorado’s four seasons each year.”
Xeriscaping isn’t just environmentally friendly – it can also save time and money for homeowners. Our guide on the benefits of xeriscaping explains how a low-water garden can reduce maintenance costs, increase curb appeal, and create a peaceful outdoor sanctuary.
Step #10: Reduce Lawn Size and Grass Usage.
Reduce Lawn Size and Grass Usage
Reduce the size of your lawn by 50%. This can be done by removing the grass from one side or edge of the property, or by planting drought-tolerant native plants that require little water.
You can also consider installing a drip irrigation system in place of a traditional sprinkler system to reduce water consumption. The cost savings you’ll see as a result will be well worth it!
| Solution | Benefits |
|---|---|
| Artificial turf | Low maintenance, visually appealing |
| Clover lawn | Low water needs, attractive to bees |
| Drought-resistant grasses (e.g. Buffalo grass) | Low water needs, adapts well to different soil types |
| Groundcovers (e.g. Creeping Thyme) | Low water needs, helps prevent soil erosion |
| Mulch | Reduces water evaporation, adds nutrients to soil |
Reducing the size of your lawn or grass usage can help to conserve water and reduce maintenance costs in a xeriscape garden. There are various alternatives to traditional grass that can be used, as outlined in the table. Each solution offers different benefits, so consider the local climate and design goals when selecting the best options for your garden.
Step #11: Install a Rainwater Catchment System
Rainwater catchment systems make it possible for you to provide your landscaping with the most natural water source available. They work by collecting rainwater from your roof and storing it in large tanks that can be used during dry spells or to provide the plants in your yard with extra water when needed.
Rainwater catchment systems are also beneficial because they reduce the amount of runoff from storm drains into nearby rivers or lakes by providing an alternative means of draining accumulated water away from homes.
Some cities have strict regulations about where you can place rain barrels, so be sure to check with city officials if you’re planning on installing one in an urban area before purchasing anything!
Step #12: Maintain and Regularly Water Established Plants After Their First Year
Once you’ve established your xeriscape, you’ll need to maintain it. Maintaining your xeriscape is different from maintaining other plants in that you should water deeply (about 2-3 inches every week) but less often.
If you’re unsure whether or not your plants are getting enough water, try this trick:
Check the soil before watering – do not check the surface of the soil; this will leave it dry and force you to over-water later.
Water gently by hand with small amounts of water at a time, about an inch of water per plant can be enough, but if possible use a moisture meter at least once per month when watering so as not to overwater or underwater your plantings
Maintaining and Watering Established Plants
| Plant | Watering Needs | Maintenance |
|---|---|---|
| Agave | Low water needs once established | Prune dead leaves and flower stalks |
| Lavender | Water only when soil is dry to the touch | Trim back after blooms have faded |
| Yucca | Drought-tolerant, water only during extended dry periods | Remove old leaves and blooms |
| Salvia | Water deeply once or twice a week | Deadhead spent flowers |
| Coreopsis | Water regularly during the first year, then as needed | Pinch back to promote bushiness |
In order to maintain and properly water established plants in a xeriscape garden, it’s important to understand the specific needs of each species.
The table outlines the watering needs and maintenance requirements for five common xeriscape plants. Keep in mind that local climate conditions may also impact watering needs, so be sure to monitor soil moisture levels and adjust watering schedules as needed.
Step #13: Control Weeds Naturally and Organically
A great way to control weeds organically is to add mulch. Mulch can be organic, such as woody bark chips or straw, or synthetic, like black plastic. Both will help keep weeds from growing in your yard while preventing soil erosion and evaporation.
Mulching also helps retain moisture so your plants don’t dry out as easily during the heat of summer and prevents roots from becoming waterlogged in heavy rains.
Another method of controlling weeds naturally is by composting them a process by which organic materials break down into rich soil amendments that improve your garden soil’s quality and fertility levels. Composting also helps prevent waste disposal issues at landfills while saving you money by reducing how much fertilizer you need to purchase!
If you’re new to xeriscaping and not sure where to begin, our guide on xeriscaping for beginners is the perfect starting point. From assessing your soil type to selecting the right plant species, we cover all the basics to help you create a beautiful, low-water garden that you can enjoy for years to come.
Conclusion
With the right plants, irrigation system and good maintenance, you can have a beautiful xeriscape garden that is both healthy for you and the environment.
These steps will help get you started on your way to a more sustainable landscape.
Further Reading
Here are some additional resources on xeriscaping:
Make Every Drop Count: Xeriscape Seven Steps to a Water-wise Landscape: This guide from the University of Georgia Cooperative Extension breaks down the seven steps of xeriscaping, with clear instructions and helpful images.
Seven Xeriscape Steps: This concise guide from Milberger Nursery offers practical tips for reducing water usage in your garden, including suggestions for plant selection and irrigation.
How to Get Started with Xeriscaping: Love Your Landscape provides a step-by-step guide to xeriscaping, as well as advice on soil preparation and maintenance.
FAQs
What is xeriscaping?
Xeriscaping is a landscaping method that emphasizes water conservation through efficient irrigation, soil improvement, and plant selection.
What are some benefits of xeriscaping?
Xeriscaping can help reduce water usage, lower maintenance costs, and create a beautiful outdoor space that is drought-resistant and eco-friendly.
What are some tips for selecting plants for a xeriscape garden?
Choose native or adapted plants that are well-suited for your climate and soil type. Look for drought-tolerant species that have low water needs and disease resistance.
How can I design a xeriscape garden that looks attractive year-round?
Incorporate a variety of plant textures, colors, and sizes to create visual interest. Also, consider using hardscaping elements such as rocks or gravel to add texture and dimension.
Do I need to remove my existing lawn to xeriscape my garden?
It depends. If your lawn is healthy and well-maintained, you can convert it into a xeriscape garden by gradually replacing grass with drought-resistant plants and groundcovers. However, if your lawn is in poor condition or requires a lot of water to stay alive, it may be best to remove it entirely and start fresh with a xeriscape design.

Hi! My name is Hellen James, and I’m a landscape designer in Los Angeles. I’ve been working with homeowners and businesses to help them improve the look of their properties for over 10 years.
